These instructions will help you plan your garden, making a cloche greenhouse configuration, choose your covering material and pipe frame. Then they will help you set up your greenhouse and make the very best use of it for great gardening and harvests!

Clip on Cover & Protect your Plants
- Cloche Clips are durable, versatile fasteners which hold greenhouse film, floating row cover, bird netting or shade cloth securely to a cloche pipe frame, even in high winds and heavy rains.
- Protect your plants from frost, rain, insects, birds, or hot sun.
- Extend your growing season by covering vegetables, fruits and ornamentals.
- Start gardening earlier by warming up and drying out your soil.
Planning your garden beds and greenhouse
We recommend permanent beds. By not walking on the soil you plant in, you keep the soil structure loose and open for better plant growth. Consider a few wide paths for wheelbarrows, and narrower foot paths between individual beds. Beds can be either raised or left at ground level. Edges can be boards or stones or left informal – follow your personal taste here but remember that raised beds dry out faster in the summer.
A Garden Clip Greenhouse works best 2’ to 4’ wide and up to 2 ½ ‘high without reinforcement or 5’ with rebar inside the hoop. It is designed to cover your plants, not you.
Example: If your garden is 8’ by 10’, don’t try to make a greenhouse that will cover it all. Split it up into two beds 3’ by 10’, with a 2’ path in between. This will allow you easy access to your plants.
Space hoops from 2’ to 4’ apart. The windier your conditions, the closer you need to space your hoops.
Be careful: don’t design too tall. You want to keep the warmth you are creating down with your plants, not several feet above them. Remember, the taller your structure, the more problems you will have with high wind.
Dry out and warm up your spring soil – Set up your green house several weeks ahead of planting.

How Many Garden Clips Do I Need
Calculate the square footage you wish to cover (the length times the width). You will need one clip for every 1 to 2 square feet.
Example: A 3’ by 7’ area is 21 square feet. You will need 10 to 20 clips depending on how tall your cover is and how windy your conditions are. If your clips blow off in the wind, use more clips and place them closer together.
Making the pipe frame
Black “poly” cloche pipe makes an excellent frame for a Garden Clip cover. Black poly pipe comes in rolls at plumbing, building supply and feed stores. It’s easy to cut with garden loppers, has a natural curve to it already, and it more durable than PVC.
Cut pipe ends at an angle for easier penetration of your soil. Lopping shears cut black poly, a hacksaw cuts white PVC.
Use ¾ inch pipe (100 psi or higher) for large covers.
An easy way to “guesstimate” how much pipe you need is to think of your hoop as a rectangle instead of an arch.
Example: if you wanted your hoops 100cm (36”) wide by 60cm (24”) high, add the height 60cm (24”), plus the width 100cm (36), plus the height 60cm (24). 220cm ( 84”) of pipe will give you a hoop of nearly the desired size.
Installing the Pipe Hoops
Measure carefully and put stakes in the ground for the corners of your Garden Clip Greenhouse – the plastic cover will fit much more neatly when the hoops are set up at the right size and shape.
Mark the corners with stakes and the sides with string.
Bend the pipe into a half circle that spans the bed then push the ends into the soil about 15-20cm (6” – 8”).
If your soil is heavy or compacted use a spading fork to loosen soil around the edge of the garden bed.
If you have very loose soil, use 60 cm (24”) rebar stakes. Pound rebar into the ground about 30cm (12”). Slip the hoop over the rebar and push the hoop down to the ground.
In the late summer when you need to cover mature plants, use this technique to create covers up to 2m (6’) tall. Use longer rebars to extend into your hoop up to where is begins to curve. When windy fall storms begin, reduce the height.
If you have raised beds with boards along the sides, push the pipe into the soil along inside the board or purchase brackets to slip the hoops into along the side of the boards.
Attaching the Cover
There are many types of cover material. Garden Clips will allow you to secure them all.
Clip on clear or milky plastic sheeting 4 – 6mil thick and create a mini greenhouse or cold frame. Hardware store 3 – 4 mil plastic sheeting will last one to two seasons in the sunlight before breaking down. Greenhouse film is 6 mil plastic sheeting containing to a UV protectorate to keep the film from becoming brittle and shattering. It will normally last 4 – 6 years.
Floating Row covers can help you to keep flying bugs out and allow air to pass through.
Bird netting, secured with your Garden Clips, lets you, not the birds, enjoy your harvest.
Drape the cover material over the hoops, and snap the clips onto the hoops. Space clips 30-60cm (12” – 24”) apart on the end hoops and approximately 60-90cm (24” – 36”) apart on the middle hoops.
New Garden Clips can be very stiff. If you have any difficulty putting your Clips on at first, place your fingers inside the clip and gently open the “C” shape wider. Then slip the clip on the hoop.
To close the ends of the cover, fold the flap down over the end, make a small tuck at the shoulders of the hoop, and secure the pleat with clips.
For easy access to your plants, pull off the clips along one side and fold back the cover.
Sunny hot days can require ventilation: pull off clips on the bottoms of the end hoops and fold back covers. Hold cover in place with clips.
Garden Clips are designed to resist the pressure of the wind. So don’t try to pull your Garden Clips straight off. Brace the heel of your hand at the bottom of the clip, and peel the clip off top to bottom. If the clips pop off in the wind, use more clips, and put them closer together.
Design Ideas for a Garden Clip Greenhouse
4’ x 12’ Cover
For over wintering lettuce, parsley and chard. Covers tomatoes and peppers for extra warmth during spring and summer.
4’ wide, 22” high, 12’ long
4 hoops of ¾” poly pipe 7’ long
6’ x 16’ Cover material
25 Large Garden Clips
High Bed Cover
Cover mature plants in the fall to protect from frost and too much rain. Pound rebar in ground about 12”. Slip pipe over rebar for extra strength.
4’ wide, 3.5’ high, 12’ long
5 hoops of ¾” poly pipe 10’ long
10 pieces of ½” rebar 3’ long
10’ x 20’ cover
40 large Garden Clips
Square Foot Gardens
4 x 4 Beds (Square Foot Gardens)
To cover two 4′ x 4′ beds, cut a 4′ x 12′ piece of greenhouse film into two 6′ x 7′ pieces.
Then use one piece of greenhouse film, 2 hoops and 12 Garden Clips to cover each bed.
Mary’s gardening techniques for using a Garden Clip Greenhouse:
Using your Garden Clip Greenhouse
If you use your Garden Clips with greenhouse film, it will work as a cold frame or tunnel cloche, and you will be able to extend your gardening season about a month on each end of a light frost. Often the coldest nights are preceded by sunny days. Any extra heat, which can be collected and stored during the day and released at night will moderate the climate and extend the gardening season further into the freezing season. By adding jugs of water around the inside edge of the greenhouse film, you will have a thermal mass for heat storage. This not only provides heat at night, it also helps your greenhouse from overheating in the sun. When your Garden Clip Greenhouse includes jugs of water, it will stay above freezing even when outside temperatures dip into the mid-twenties after sunny days.
Germinating Seeds
To start healthy, vigorous plants, germinate the seed in a securely warm but not necessarily bright place. Then grow the seedlings in bright light where the temperatures stay above 13ºC (55°F) and about 21ºC (70°F) during the day.
Cool season plants, such as lettuce, spinach and broccoli will germinate at about 15ºC (60°F). Warm season plants such as tomatoes, basil and peppers germinate best at about 27ºC (80°F).
Find a place in your house that will maintain the specified temperature day and night. Beware: A sunny window may not be the best place! It may get too warm during the day and/or too cold at night. The top of the refrigerator usually works best. Don’t worry about the lighting right now – seeds don’t need light to germinate.
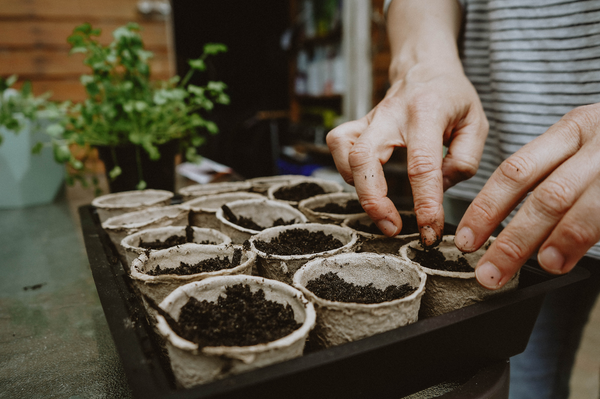
Start your seeds on a wet paper towel wrapped in clear plastic. (So you can see them)
Check your seeds several times a day. When the seeds germinate (watch for that first little root tip to emerge) move them to starter pots or tray.
You may choose to germinate your seeds in the starter tray instead of a paper towel.
The Spring Garden
As the Garden Clip greenhouse captures every bit of sunlight and warmth some plants may burst into productivity in March. Jugs of water can store solar heat well. Cold, wet ground can be dried out early. Just set up cover and let the sun go to work. Cool season crops such as peas, spinach, lettuce and greens can often be started early when protected by a cover.
The Summer Garden
In some areas covers are needed for certain summer crops. For instance, in mountain areas, clear nights can be cold or frosty even in the summer. Covers well lined with jugs of water allow your gardens to take advantage of your great midday sun and then survive the cold night. In foggy or rainy climates basil, peppers and melons need covers all summer long. Be sure to ventilate well when the sun is out.
The Autumn Garden
Tomatoes ripen best when warm and dry. Build a high structure to roof them – ventilate well to minimize diseases. Keep the roots dry to signal tomatoes for a final ripening flourish. (This mimics the seasons in South America where tomatoes evolved). Extend your harvest beyond the first frosts by putting covers back up.
The Winter Garden
Water jugs are especially valuable in the winter. A second layer of plastic, bubble wrap or cloth (at night) retains more heat as well. Cool season crops such as lettuce, greens, cabbages and peas are the most tolerant of winter. Where your winters are mild you can extend the growing and harvest seasons later in the fall and start earlier in the spring. Plants are limited by day length as well as by cold so you will still have less production than in the summer because plants will be larger (to get more light) and grow slower but they are fresh and available in your garden, not the grocery store!
