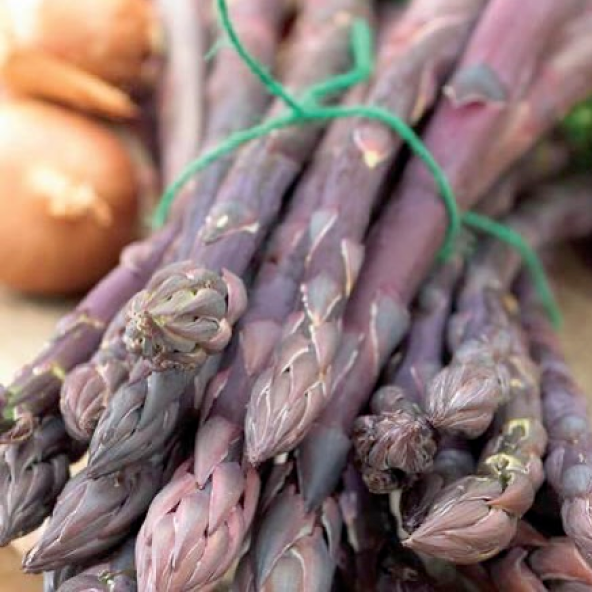
Snowdrops Galanthus Mount Everest 5/pk

SKU: BU458
$9.99

Snowdrops are among the very first flowers to emerge at the end of winter, so they are always a welcome sight. Galanthus... Read More

Click here for more options
*Please note, this product cannot be shipped to the USA.
See our FAQs for more info.
Good for Containers
Shipping & Returns

West Coast Seeds ships anywhere in North America. However, we are not able to ship garlic, potatoes, asparagus crowns, bulbs, onion sets, Mason bee cocoons, or nematodes outside of Canada. We regret, we cannot accept returns or damages for orders outside of Canada. The minimum shipping charge to the US is $9.99.

Snowdrops Galanthus Mount Everest 5/pk

Product Details

Snowdrops are among the very first flowers to emerge at the end of winter, so they are always a welcome sight. Galanthus Mount Everest snowdrops are the giants of their kind at 20cm (8") tall. They are deer resistant and hardy to Zone 4. They will work in patio containers, but they're even nicer naturalized into a landscape in full sun to partial shade. After several years, they take on a wild look. Five bulbs per package.

Plant height to 20cm (8")
Plant in full sun to partial shade

Quick Facts:

We'll notify you when this product is back in stock.


Snowdrops Galanthus Mount Everest 5/pk

We don't share your information with others.

Your notification has been registered.  Click to close!

All About Snowdrops Galanthus Mount Everest 5/pk

Starting

Starting
Follow the directions on each package as you unpack your bulbs. The depth depends on what type of bulb it is, and how large the plants are expected to be. In a very general sense, bulbs are planted with the pointed end up about 15cm (6β€³) deep. Be sure to follow the instructions on your individual bulb package.

Bulbs benefit from potassium-rich bone meal at planting time. They will probably produce flowers without bone meal, but a couple of tablespoons full buried with each bulb will produce stronger plants.

If you have some Complete Organic 4-4-4 Fertilizer, that will also help bulbs grow into strong flowering plants. It is sound advice to label or mark out where your fall bulbs are planted so you can remember not to dig there in the spring. Once growth starts in the spring and leaves begin to emerge, you have the option of top dressing (scattering on the surface of the soil) with a Complete Organic Fertilizer. This is a particularly good step if you plan on leaving the bulbs in the ground for the long term.

If you plan on lifting the bulbs after they have bloomed, spring fertilizing is not really necessary.

Once your spring tulips and daffodils have accomplished their task of bringing colour and joy to your spring, you should decide whether to lift them or not. Each plant would prefer to be left in place and send up leaves with which to gather more energy in the bulb for next spring. Most varieties will also begin to form new bulbs beneath the soil. But as the leaves become spent during the summer, they can be unattractive. So either remove spent leaves and leave the bulbs in place, or gently lift the bulbs and transplant them somewhere out of sight.

To lift bulbs, use a garden fork to gently loosen the soil. Your soil may have become quite packed down over winter, so take care when lifting. Try to dig down to the bulb itself, rather than pulling it up by its tender stem. The stem will tell you where each bulb is, so it’s important not to break the stem from the bulb.

After their foliage dies back, bulbs go dormant in preparation for winter. At this stage they can be lifted and labeled (by type or colour) and stored in paper bags for transplanting or giving away. Just like with garlic and onions, allow some time for your harvested bulbs to dry out by leaving them out in a cool, airy place out of direct sunlight. Brush off as much soil as possible, but do not peel away the layers that surround each bulb.

How to Grow Plant Stock

Step 1

Timing

Potatoes are tolerant of cool soils and moderate frosts. Minimum soil temperature at planting time should be 6Β°C (43Β°F). Plants will emerge about 2-3 weeks after planting.

Step 2

Starting

Set tubers approximately 7-10cm (3-4β€³) deep, and 30cm (12β€³) apart in prepared trenches spaced 60cm (24β€³) apart.

Step 3

Growing

Ideal pH: 5.5-6.5.

Well-drained, loamy soil rich in organic matter is preferred, but potatoes are not overly fussy. If heavy clay or clay/loam soils are used, double-digging and improving organic matter content by growing cover crops or adding compost or manure can correct drainage problems. Do not lime areas planned for potatoes. When the above-ground portion of the plant is 30cm (12β€³) tall, β€œhill up” soil 15cm (6β€³) around the plants. It’s okay to cover green leaves. Straw or grass mulch also works well. This process can be repeated up two or three times. It is recommended that no irrigation take place between planting and sprout emergence in order to avoid disease. It is important, though, not to let the soil become too dry, and to irrigate while plants are flowering.

Step 4

Germination

Days to maturity: From direct sow.

Step 5

Harvest

β€œNew” potatoes can be harvested about 7-8 weeks after planting. Potatoes grown for late summer and fall β€œfresh” use can be dug when tubers are full size or when foliage begins to die. For potatoes grown for storage and winter use, harvest should take place after vines have died back, alternatively, the plants may have to be cut or mown. After killing and removing the plants, tubers should stay in the ground for another 2 weeks to allow firming of their skins for storage. Optimum storage conditions are a dark location 4-7ΒΊ C (40-45ΒΊF) and 90% relative humidity. Paper sacks stored in a garage will suffice. Check them often though to remove any that are starting to go soft.

Tips

Disease & Pests

Late blight ( Phytopthera infestans) is problematic, especially on the Coast. Symptoms appear as water-soaked gray spots on tips and margins of leaves, leaf axils, and on stems. Even if nothing shows on the leaves, late blight makes black spots under the skin of the tuber. Left unchecked, it will destroy the plant. Copper spray is effective if applied regularly through the growing season, including drenching the soil. The most important step to avoiding disease is to establish a vigorous and healthy crop; this can be accomplished by using disease free seed, planting in rich soil, avoiding pre-emergence irrigation and watering carefully once the crop emerges.

The most common pests to bother your potatoes on the coast are wireworms (especially in gardens recently taken out of grass).

Wireworms are the larvae form of a very slender black beetle known as the Click Beetle because if you turn one over, when it goes to right itself, it makes a β€œClick!” sound. The beetle lays its eggs in grass, and the larvae eat in our gardens. They burrow into the roots, seeds, and underground stems of tomatoes, corn, potatoes, peppers, and squash. The damage is worse on land that has been recently been converted from lawn to garden. The larvae themselves are crisp, golden, up to 1cm long and can live for up to 7 years in the soil.

If your seeds don’t appear to sprout, or the plants wilt and die suddenly, your soil may have wireworms. An irregular pattern of plants dying in a field is typical of wireworm damage. To find out if you have wireworms before you start planting, create bait made of carrot and potato pieces. Bury the bait in 10cm of soil, and mark it with a stick. Dig it up in 3 or 4 days. If there are more than 1 or 2 wireworms per bait, you have a problem. They are difficult to control but regular cultivation of the top 10cm of the soil, as well as trapping them on pieces of potato, and crop rotation will slow the damage. Digging in an overwintered Cole crop can also be effective. Predatory nematodes work also.

Companion Planting

Bush beans, Brassicas, carrots, celery, corn, garlic, marigolds, onions, and peas all do well planted near potatoes. Avoid planting potatoes near asparagus, cucumber, kohlrabi, melons, parsnips, rutabaga, squash, sunflower, and turnips.

Customer Reviews & Questions